Brackets is my text editor of choice (see § 1.4.1).
I will use Brackets to write the entire HTML, CSS and jQuery code used within this website. Brackets is good, it has the facility to allow the viewing of web pages in real time as they are being developed—this means that any changes made to the HTML or CSS is immediately visible on the website.
This is a very useful facility and I came to the conclusion that designing with the website open is the best way to see and understand what you are doing.
Brackets lets you add extensions that do certain things: auto-save, additional menu functions, automatically add browser prefixes &c.
I’m recommending Brackets as the text editor of choice—you don’t have to use it, I appreciate that this is just my personal preference; however, I do use it extensively and the images of code being developed and the colour coding used is all based on Brackets.
I’m going to assume that you are using Brackets, the next sections deal specifically with installing and configuring Brackets, if you are not using Brackets, skip to section 4.2.
4.1.1
Getting and installing Brackets
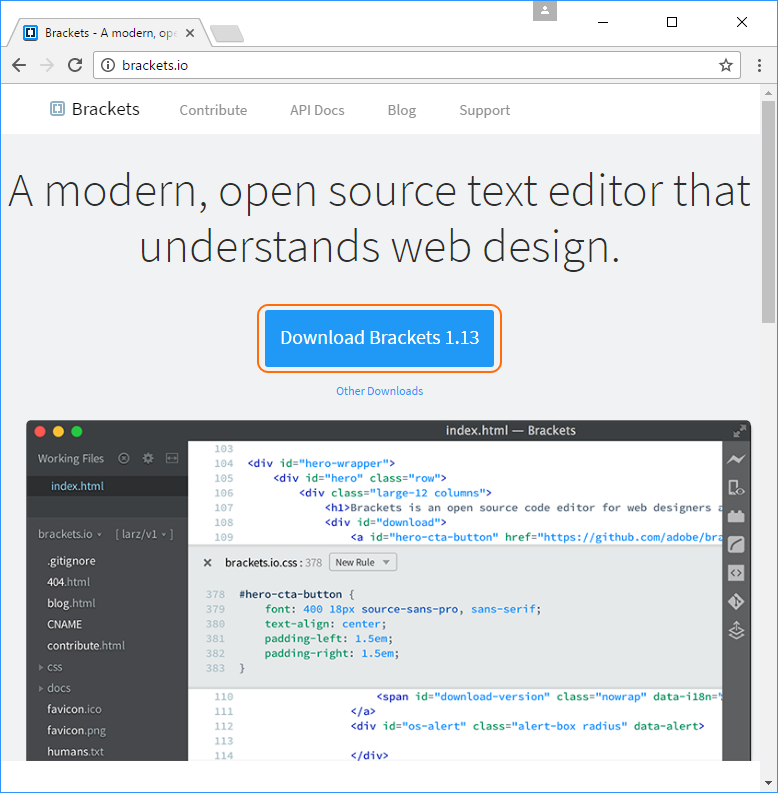
Brackets is available from the brackets.io website. I’m currently using version 1.13. It’s pretty easy to get; just click the big blue download button (highlighted in orange in Figure 4.1).
Figure 4.1 Brackets text editor download
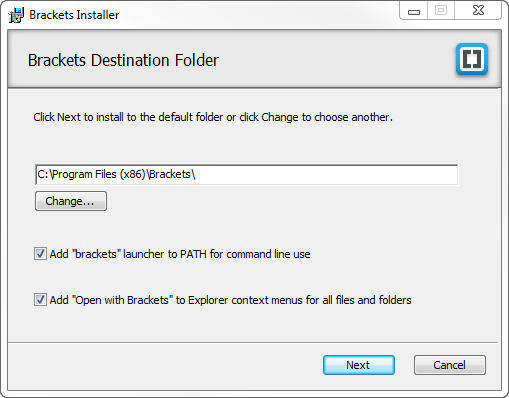
This will download the brackets.release.1.13.msi file.
Run this file and leave all the default options selected (Figure 4.2)
Figure 4.2 Brackets text editor install options
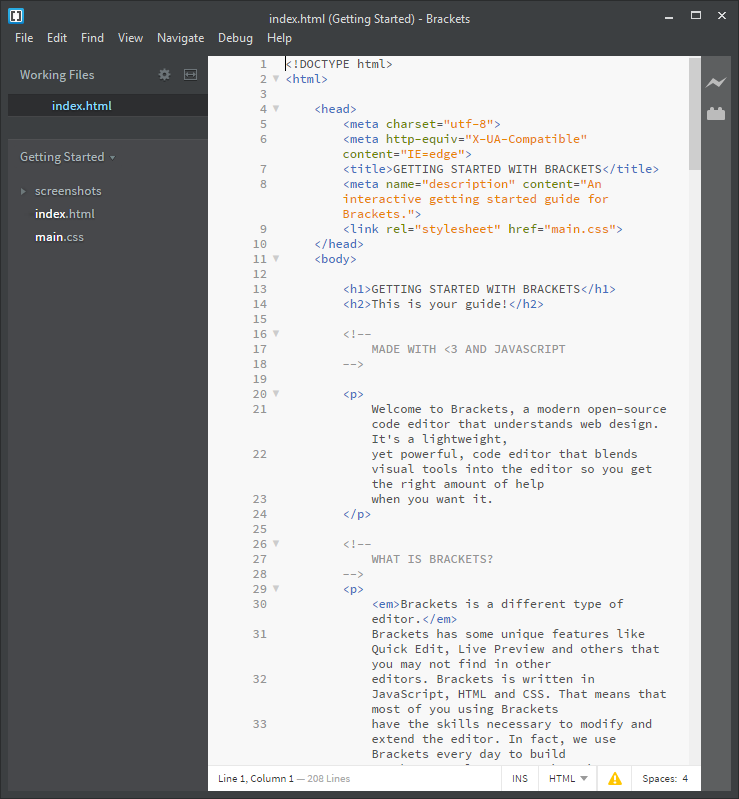
After the installation is complete, start Brackets, it will look something like Figure 4.3.
Figure 4.3 Brackets first use
4.1.2
Adding extensions to Brackets
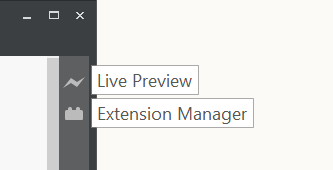
Right, we’ve installed Brackets and now we can install some extensions. Extensions are “plugins” that add extra functionality to Brackets, one comes pre-installed with Brackets, this is the live preview function (this is the lightning bolt icon in the right hand side bar, Figure 4.4).
Figure 4.4 Brackets sidebar
The live preview browser updates in real time whenever changes are made to the HTML or CSS files, changes to other file types (Java script for example) cause the preview page to be reloaded when the file is saved.
Brackets has a fairly extensive library of extensions available to it. Most of these are written by third-part developers (rather than Adobe) and I’ve installed several that I think are useful.
These are:
Extension
Search for
Function
Autoprefixer
Autoprefix
Automatically adds browser prefixes to CSS code (all those –webkit things that nobody understands)
Autosave files on Window Blur
Autosave
Automatically saves all the files open in Brackets whenever you click out of the Brackets window
Brackets icons
Icons
Adds little icons to the side of each file in the file tree showing its type (HTML, CSS, JS &c.)
Copy as HTML
Copy HTML
Copies code to the clipboard and preserves the colour coding used by Brackets (I use it to copy code from Brackets into documents)
Interactive Linter
Interactive
Analyses the HTML, CSS and Java script code and highlights errors in the syntax and structure—a process referred to as “linting”†1
Pop-up menu Brackets
Pop-up
Adds case conversion functionality to the pop-up menu that appears when text is right clicked in the Brackets window. It adds uppercase, lowercase and camel case†2 conversions.
Table 4.1 My selection of Brackets extensions
To add extensions to Brackets click the Extensions Manager icon (it’s the second icon in the right hand side bar; it looks like a Lego brick, Figure 4.4). This opens the extension manager dialogue box (Figure 4.5).
†1
Linting: (present participle of the verb to lint—yes I know, I think lint is the stuff you get off old jumpers too; and it’s definitely not a verb) is the process of automatically checking software for errors—this process is usually carried out by another software programme called (would you believe it) a “linter”. Apparently it started with C code and there is a whole Wikipedia article on it here.
†2
Camel case is the practice of joining words together and capitalising the start of each word (CamelCase for example), its more formal name is medial capitals.
Figure 4.5 Brackets extension manager
To find the extensions, click the available tab and enter the “search for” terms listed in Table 4.1 in the search box at the top; select the actual extension from those presented by the search and click install on the right hand side.
It is my experience that Brackets should be closed and re-started after each extension is installed. It can tie itself in knots if you don’t.
The Copy as HTML extension is not required for coding (the others all make coding easier apart from the icon thing, that just makes it look nice), I use it purely to copy code from Brackets and paste it into other documents (it preserves all the syntax colour coding). It’s how I got the code fragments from Brackets into the pdf document version of this website.
I also use an extension called Brackets-Git (which I haven’t listed in the table); I use this as a version control mechanism for the website. Git is a version control system and I’ve written a whole website about it here. Git has quite a steep learning curve and you don’t need it for what we are doing here. If you want to use version control, check out my Brackets-Git website. To get the extension search for Bracket-Git in the Brackets extension manager, it’s the one by Martin Zagora.
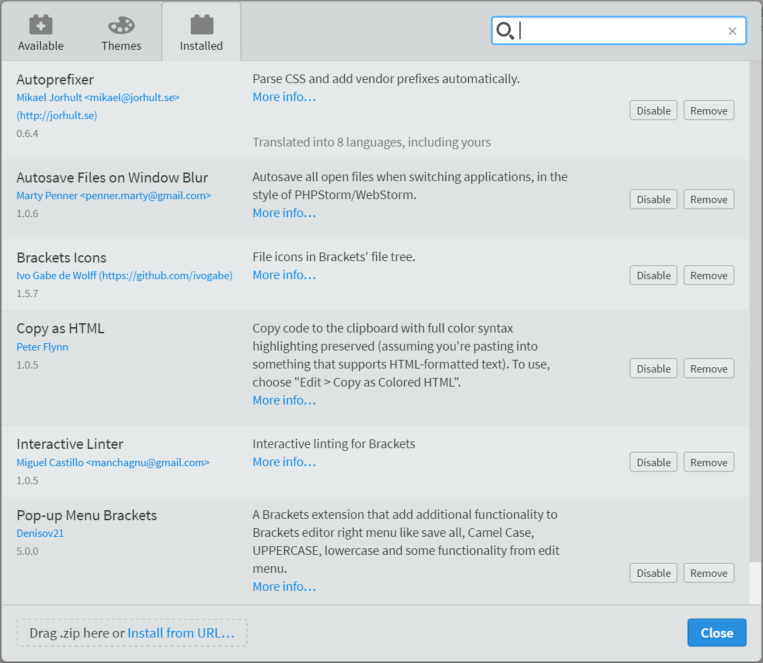
Uninstalling an extension is much the same, click the installed tab and then click the remove button next to the extension you want to uninstall. It will require Brackets to close and re-open. This is how to uninstall the Extracts extension if you don’t want it.